How to create and publish your Amplune artist bio and SmartLink page
Follow the complete Amplune workflow with screenshots: review a claimed artist page, add official links, save the draft, publish it, test it and share it.
Published 20 September 2026 · Reviewed by Amplune editorial · Updated 20 September 2026
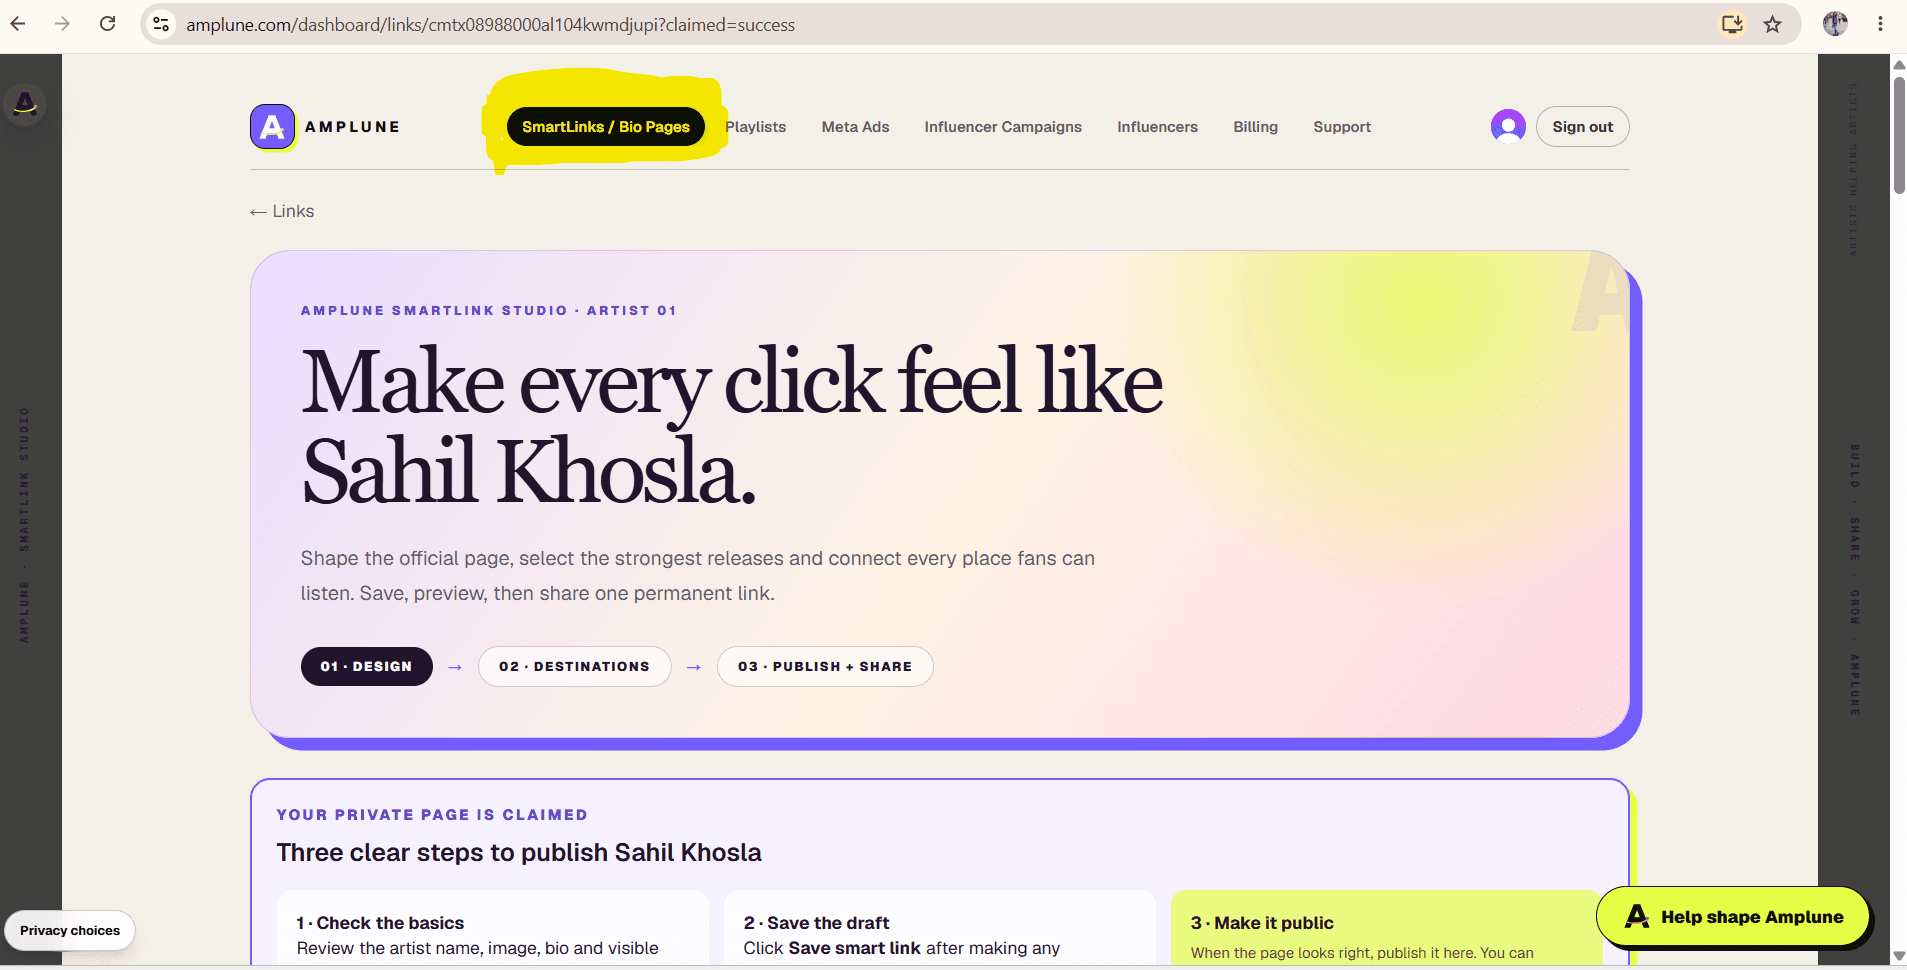
Step 1 Open SmartLinks and find your claimed draft
Sign in with the Amplune account you used to claim the private artist-page preview. Open SmartLinks / Bio Pages from the workspace navigation. If the claim link sends you directly to the editor, you can continue there.
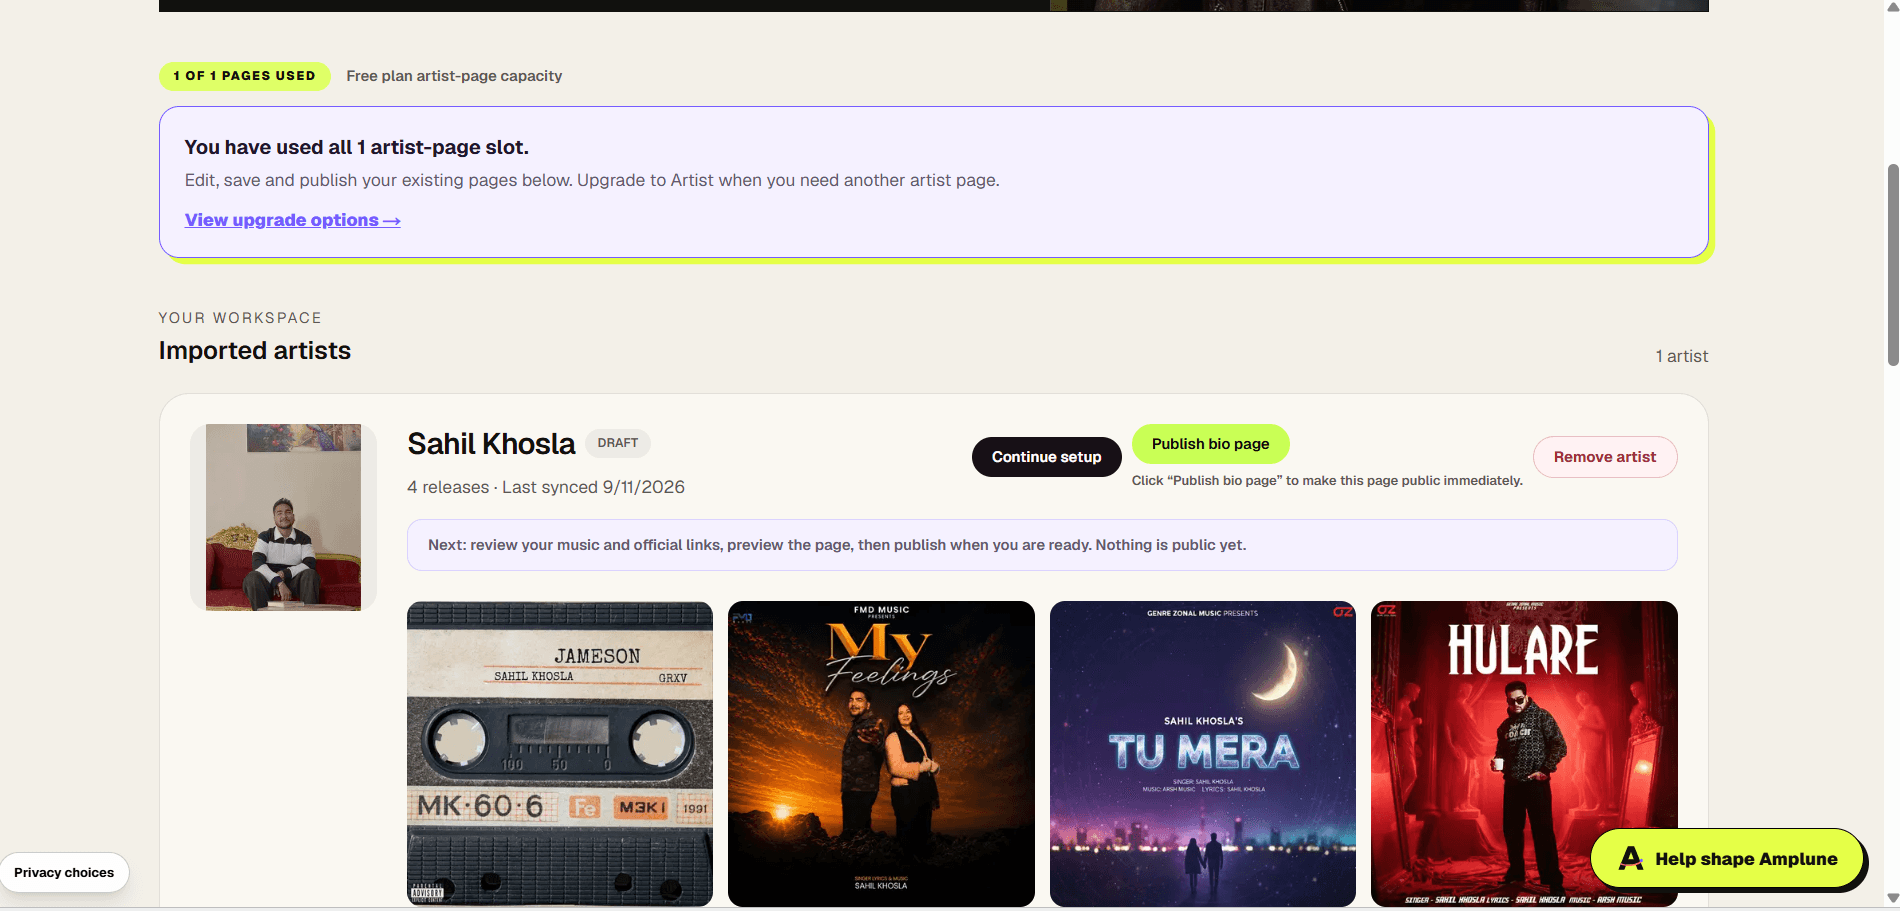
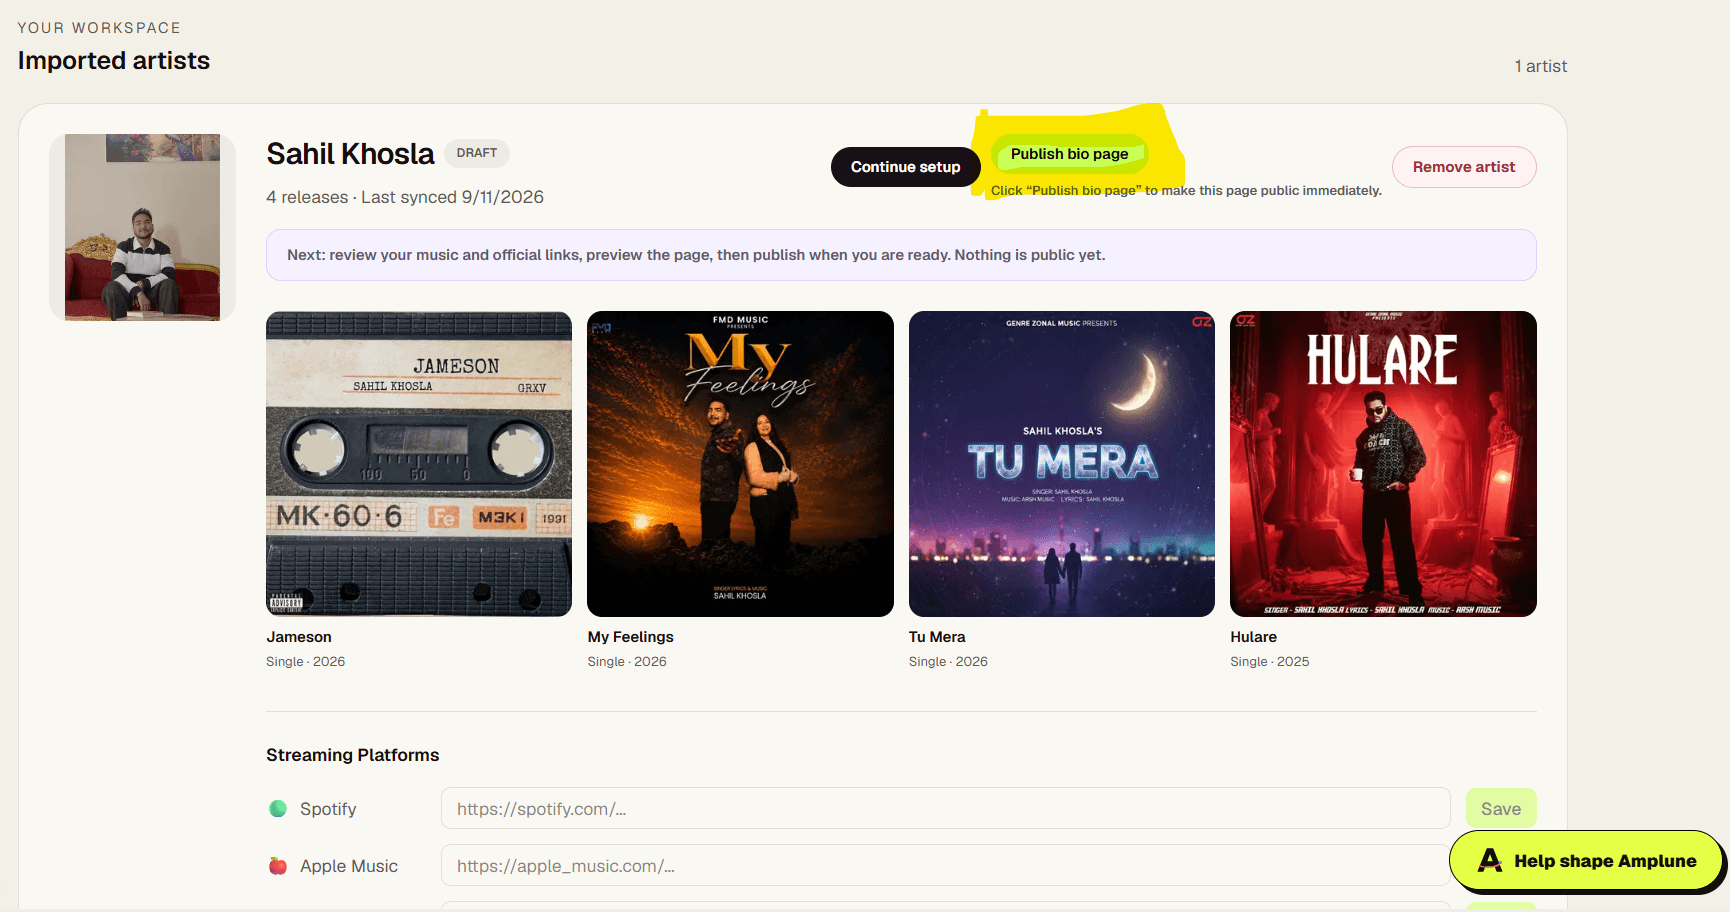
Your Spotify profile appears under Imported artists with its image, releases and last synchronization date. A DRAFT label means the page is still private. Select Continue setup beside the artist you want to publish.
Step 2 Check the page design and official artist details
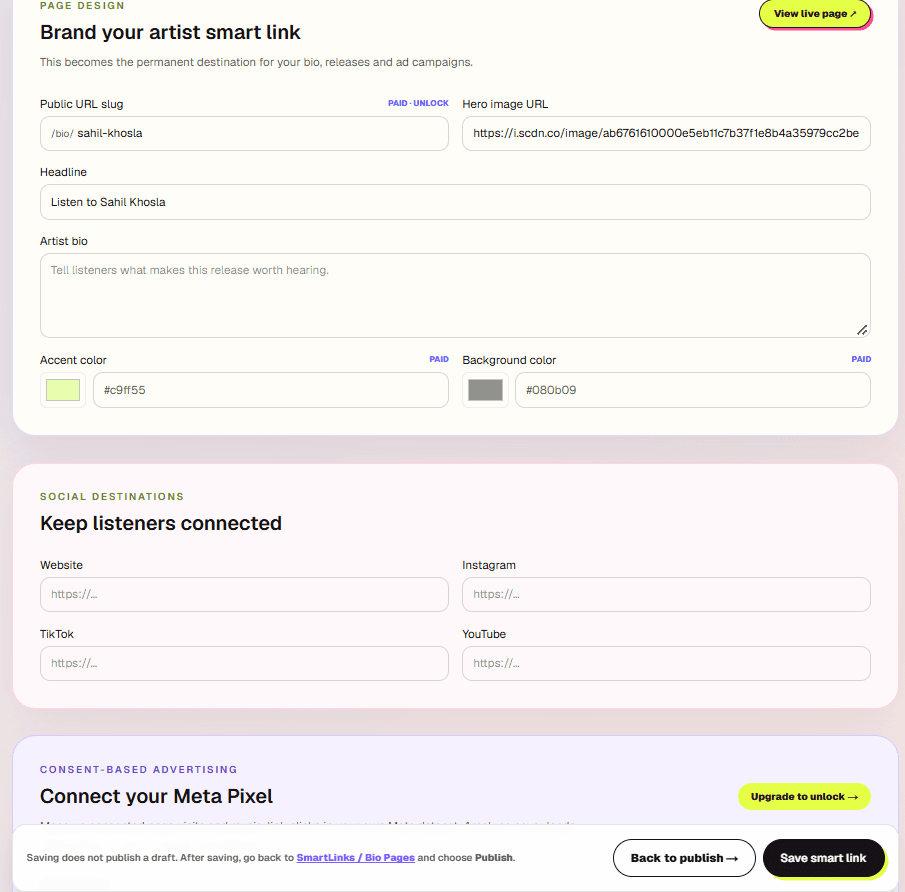
Review the hero image, headline and artist bio. These details explain who the artist is and why a listener should explore the releases. Use a rights-cleared image and keep the headline direct. The public URL slug and page colours are paid customisation options; you do not need them to publish the free page.
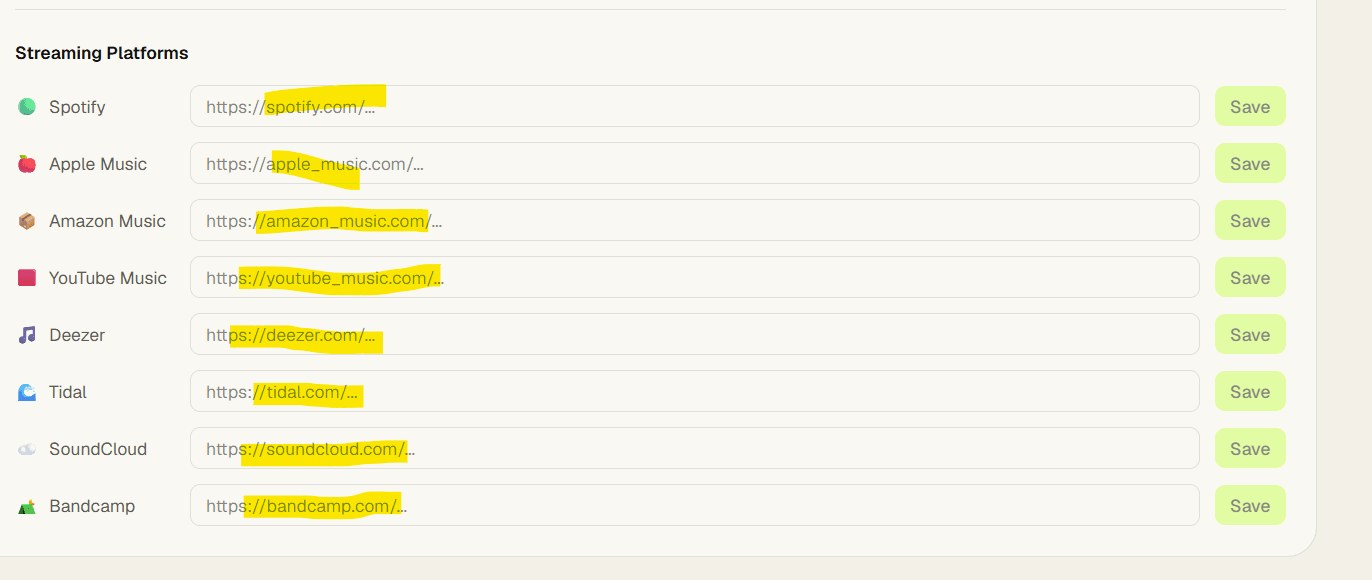
Add only official Website, Instagram, TikTok and YouTube URLs, then open each address in a separate tab to check it. A Meta Pixel is optional, available on an eligible paid plan and not required to publish. Amplune loads the Pixel only after the visitor accepts advertising tracking.
- Confirm the artist name and hero image
- Write a short, accurate headline and bio
- Add official social and website destinations
- Leave optional paid settings unchanged unless you need them
Step 3 Review the releases and music destinations
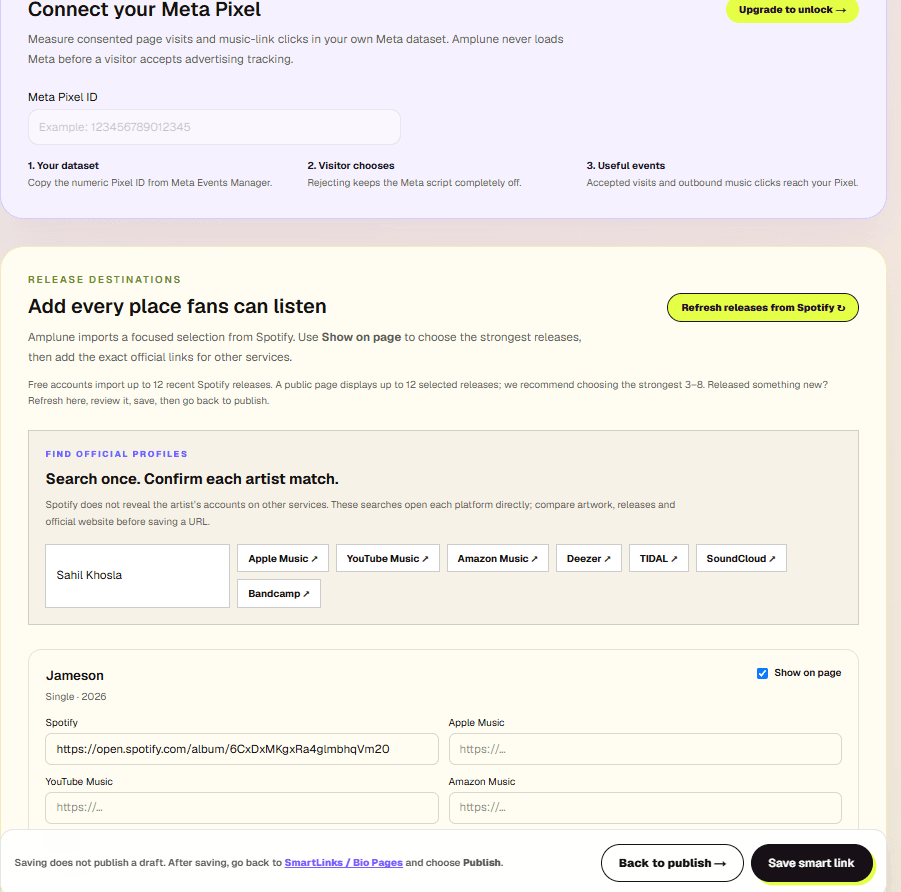
Amplune imports recent releases from the public Spotify catalogue. Use Show on page to choose the strongest releases for the public page; three to eight focused choices are usually easier for listeners than showing everything.
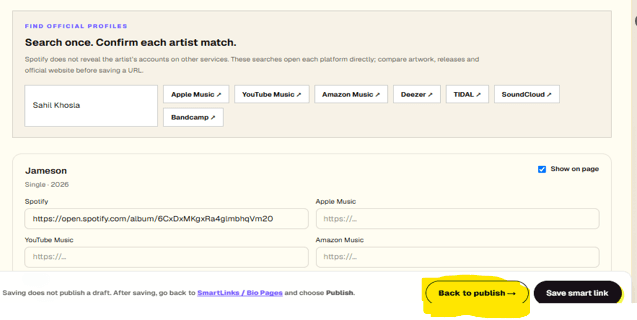
For every visible release, confirm that Spotify and any added Apple Music, YouTube Music, Amazon Music, Deezer, TIDAL, SoundCloud or Bandcamp address opens the exact artist or release. Select Refresh releases from Spotify if a new release is missing, then review it before saving.
Step 4 Save the SmartLink draft
Select Save smart link after making changes. Wait for the saved confirmation before leaving the editor. Saving protects the draft or updates an existing public page, but saving a draft does not publish it.
Select Back to publish to return to SmartLinks / Bio Pages. This separate publishing decision prevents an unfinished page from becoming public accidentally.
- Save after changing page details
- Wait for the confirmation message
- Remember that Save smart link and Publish bio page are separate actions
Step 5 Publish the artist bio page
Back in the artist workspace, check the page one final time: artist details, visible releases, music destinations and social links. When everything is ready, select Publish bio page.
Publishing makes the page publicly accessible at its Amplune bio URL. You can unpublish it later, but do not publish placeholder content, incorrect music links or an image you do not have permission to use.
Step 6 Confirm the page is published
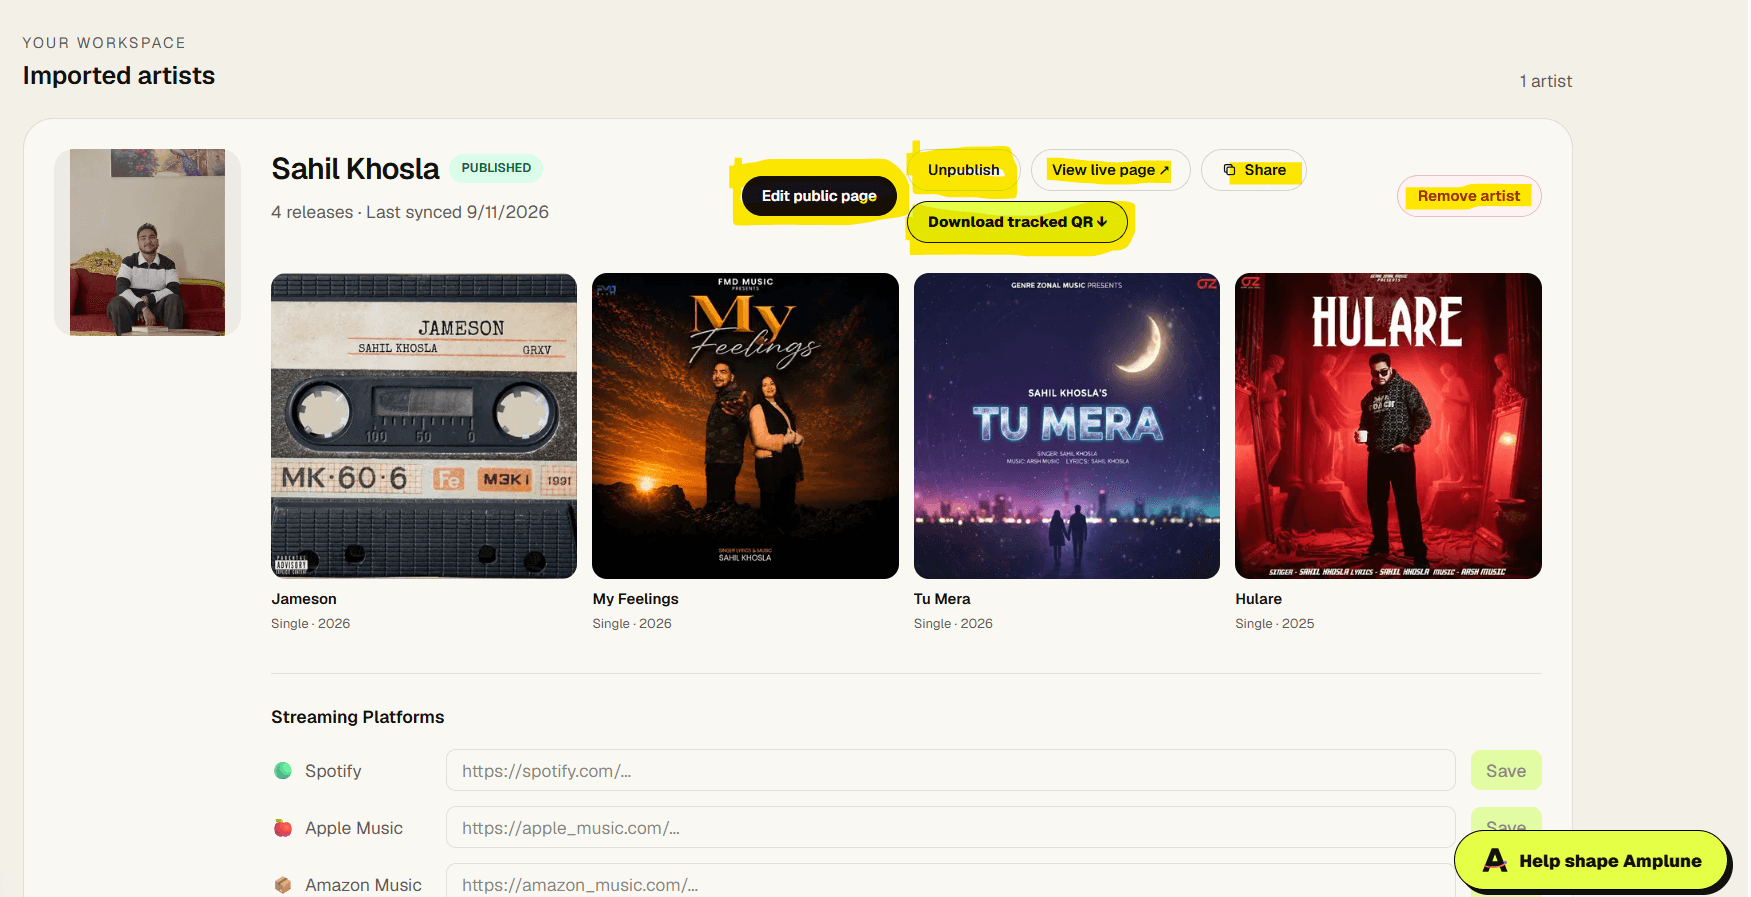
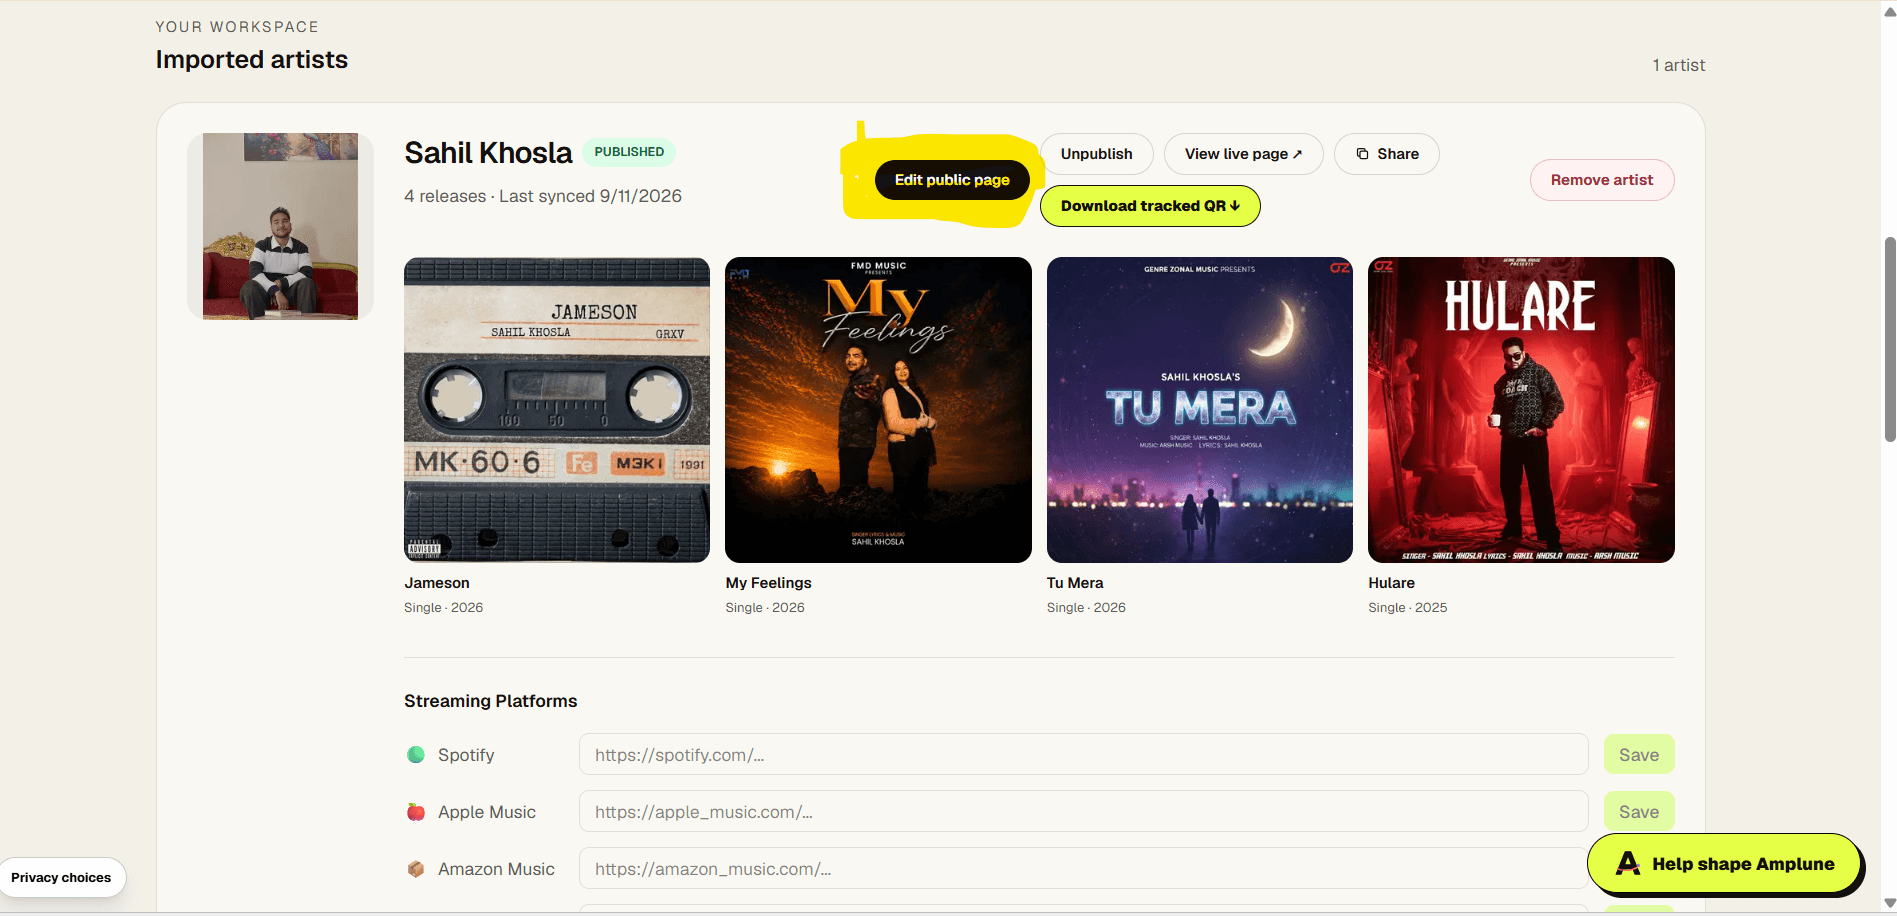
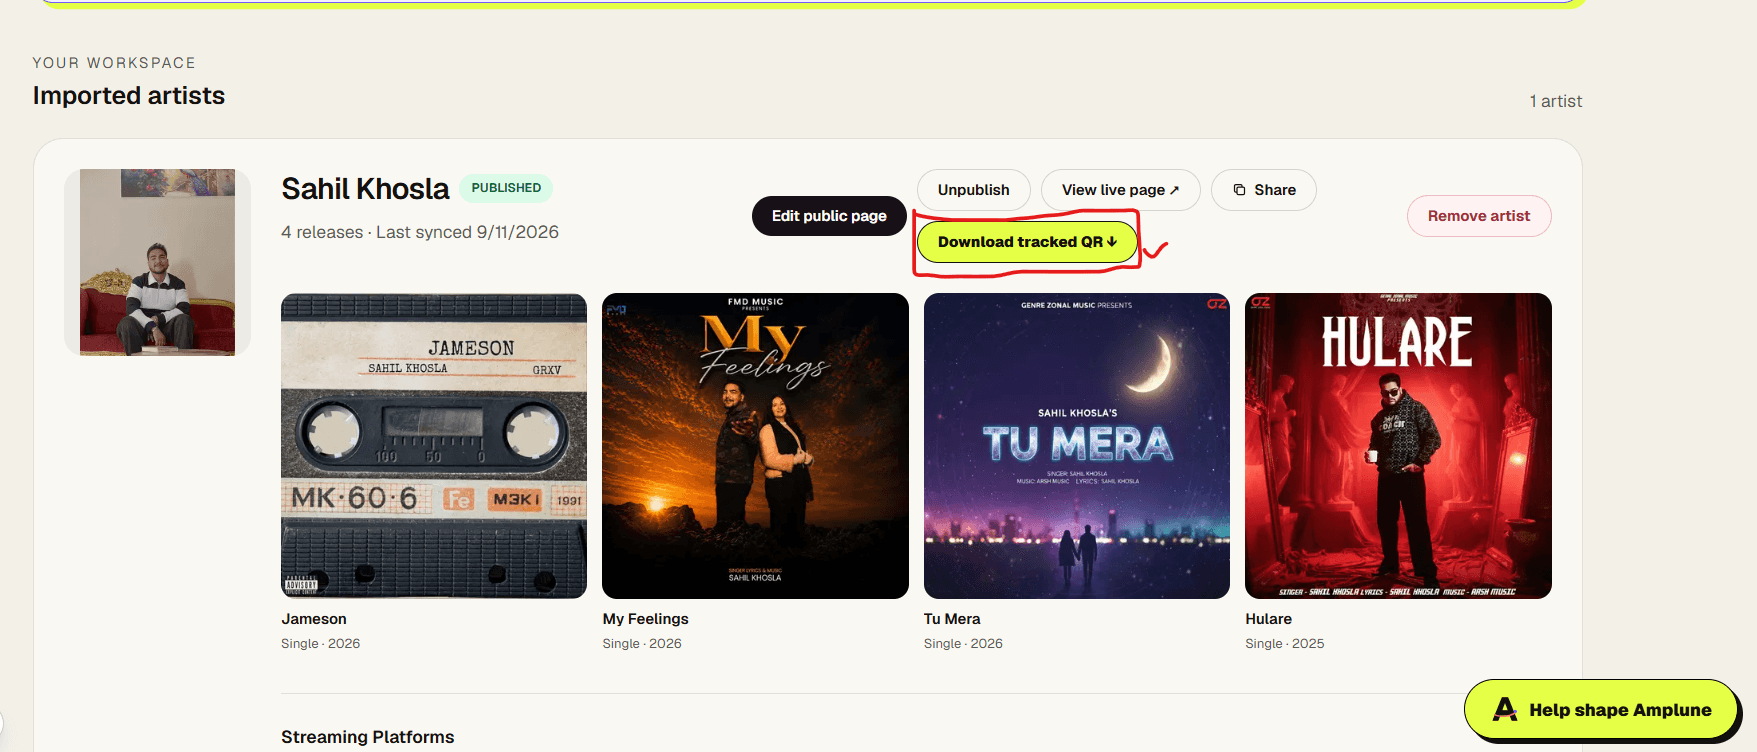
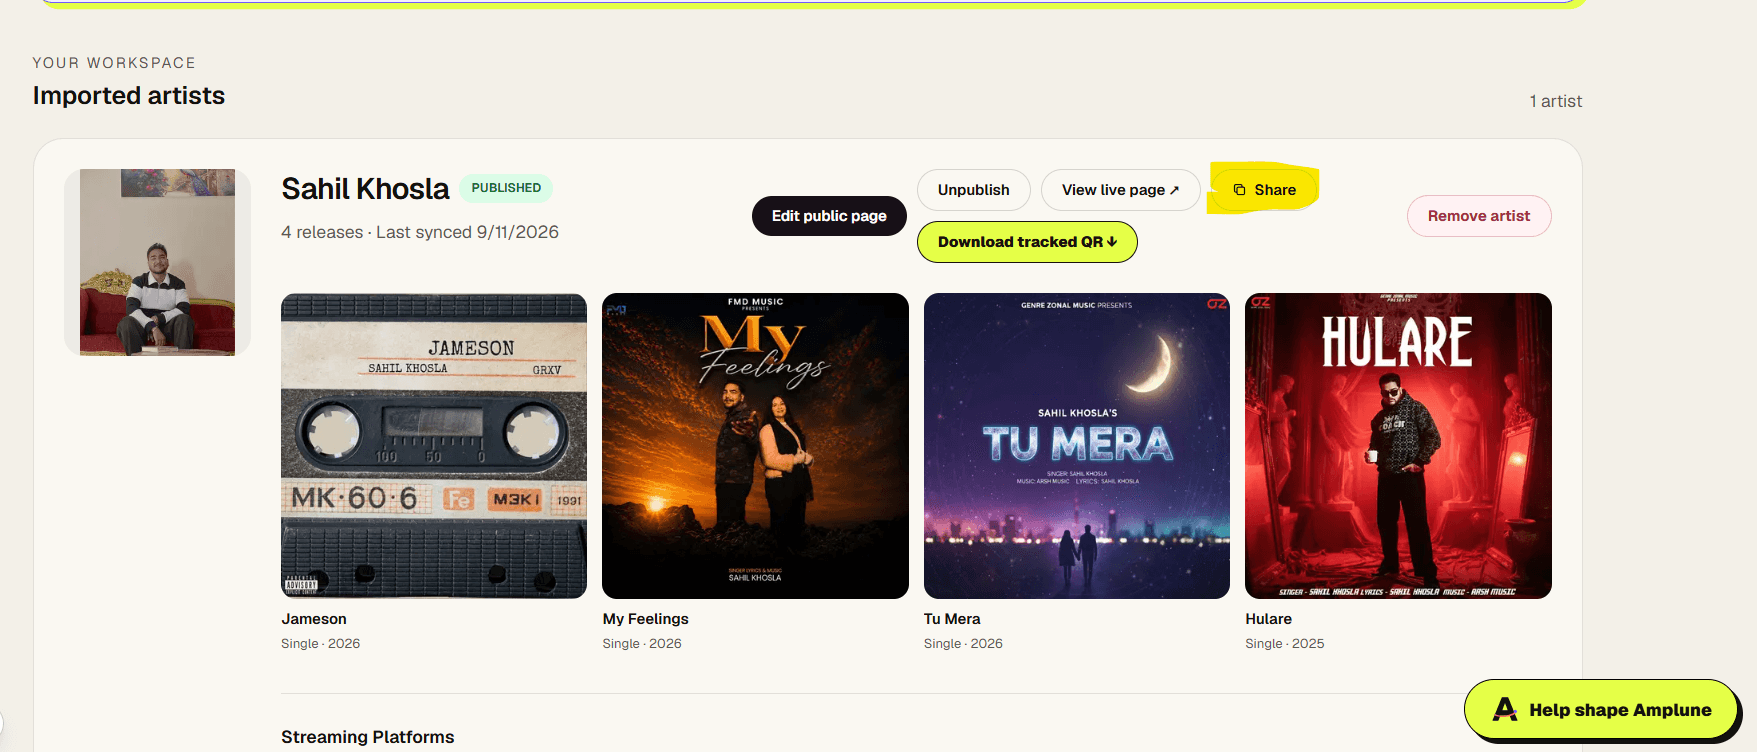
The artist card changes from DRAFT to PUBLISHED and adds controls for Unpublish, View live page, Share and Download tracked QR. This is the clearest confirmation that the page is public.
Unpublish takes the public page offline. Remove artist is different and removes the artist from the workspace, so use it only when you genuinely intend to remove that profile.
Step 7 Open the live page and test every listener path
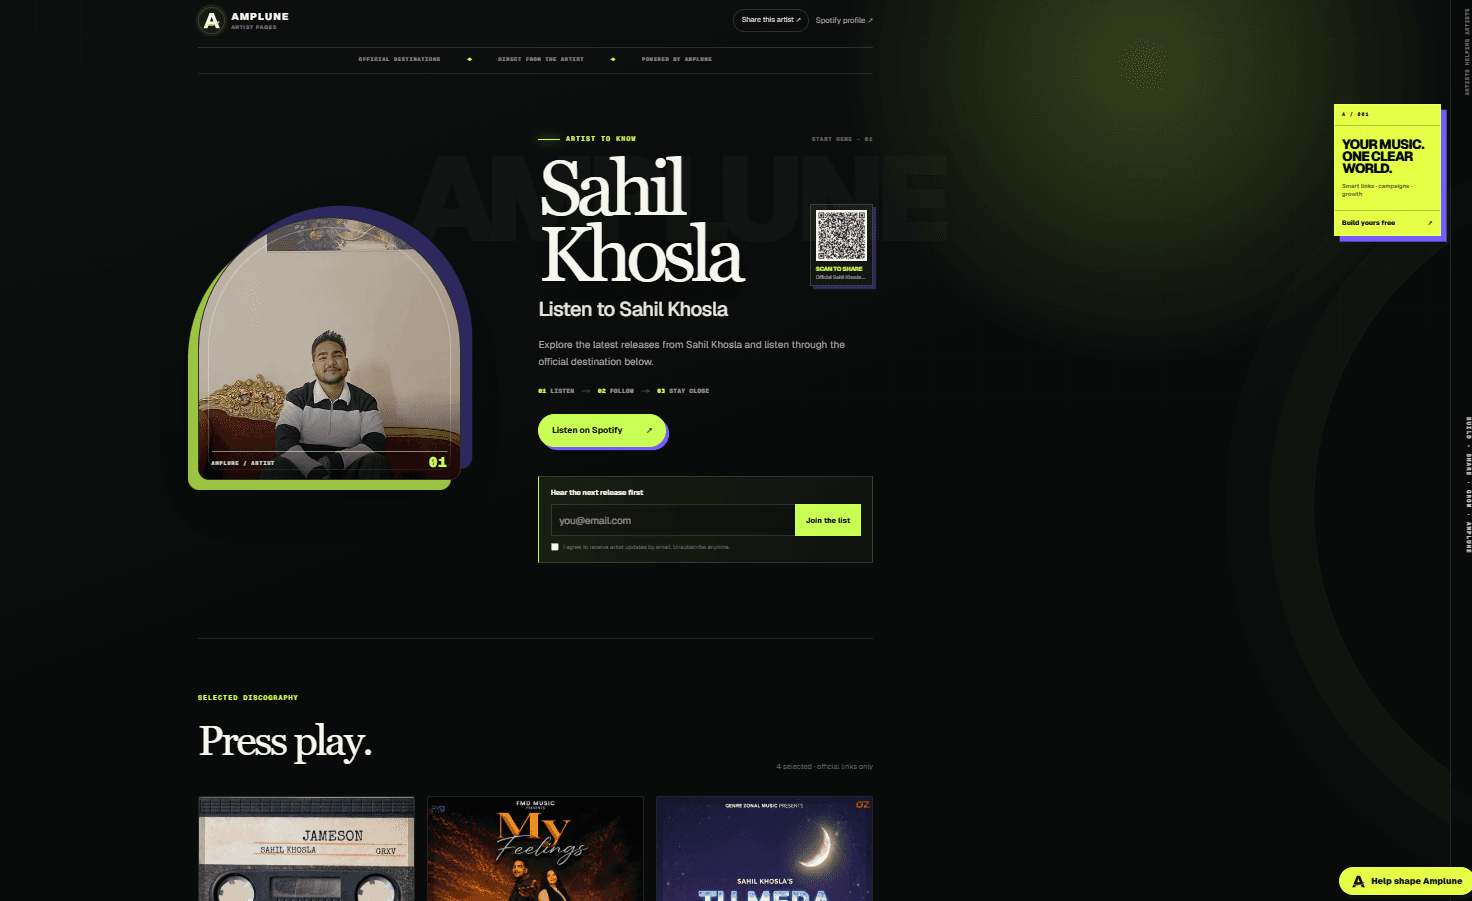
Select View live page and inspect the public experience on desktop and mobile. Check the artist image, headline, bio, selected releases and the order of the primary listening actions.
Open every displayed music destination and confirm it reaches the correct official artist or release. Fix a wrong or incomplete address through Edit public page before sending traffic to the page.
Step 8 Edit share and download the tracked QR
Select Edit public page whenever the bio, image, social destinations, releases or music links need an update. Save the changes and reopen the live page to confirm the newest version is visible.
Use Share to copy the public page URL for social profiles, campaign messages and direct outreach. Download tracked QR creates a page-specific QR image for posters, release cards and other promotional material. Test the QR with a phone before printing it.
Step 9 Check activity after sharing
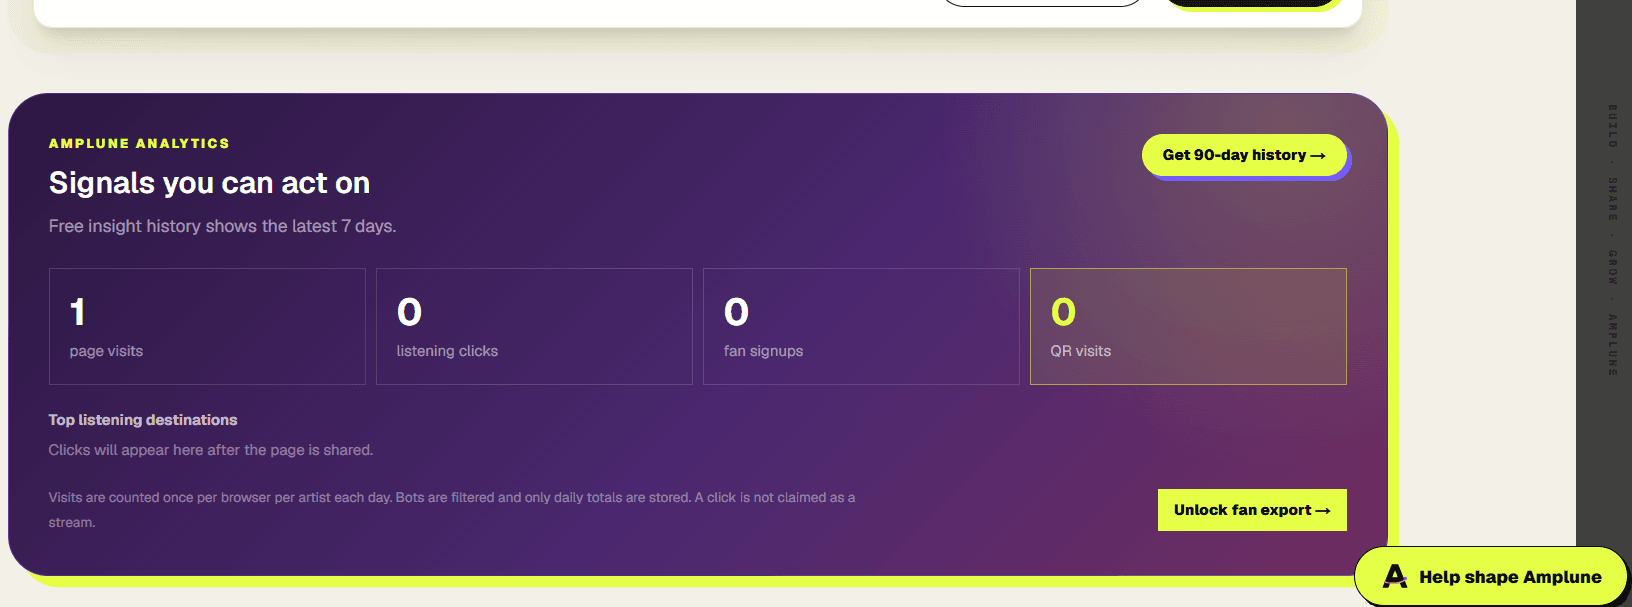
Amplune Analytics reports page visits, listening clicks, fan signups, tracked QR visits and top listening destinations. Free accounts show the latest seven days; paid plans provide longer history and eligible fan export options.
Treat a listening click as intent, not as proof of a stream. Compare sources and destinations over several campaigns to learn which messages and channels bring the most useful visitor actions.
Final publishing checklist
Before sending the page to fans, complete one final check from a logged-out browser or private window. The page should load without dashboard access, explain the artist clearly and send every button to the intended official destination.
- The artist image and bio are accurate and approved
- Only the strongest intended releases are visible
- Every social and music destination works
- The page is marked PUBLISHED
- The live URL and tracked QR open the correct page
- The page has been checked on a phone
Official sources
Pricing and features can change. Check the current provider pages before buying.
Affordable by design · shaped by artists
The affordable, artist-first alternative
Amplune was started by independent artists who wanted solid release tools without paying for several disconnected platforms. You can start with a free artist workspace, then add campaign-ready SmartLink controls with Launch at €7.99 per month excluding VAT. Growth is €19.99 per month excluding VAT for the broader connected workflow.
Artist feedback goes directly into the product roadmap. The team reviews recurring needs, tests focused improvements and can ship useful changes quickly—while protecting reliability, privacy and artist control. The goal is not to charge more for complexity; it is to build the practical platform independent artists actually need.
Put this into practice
Choose the next step that matches the job you are trying to complete.